
Appearance
Connect Cursor
Wire Cursor to Chartbuddy Hub over local stdio MCP.
Setup via Chartbuddy Hub
- Install Chartbuddy Hub and launch it once (approve OS security prompts).
- Open AI connections in Hub (title-bar cable icon).
- Connect Cursor. Hub writes the server into your user Cursor MCP config.
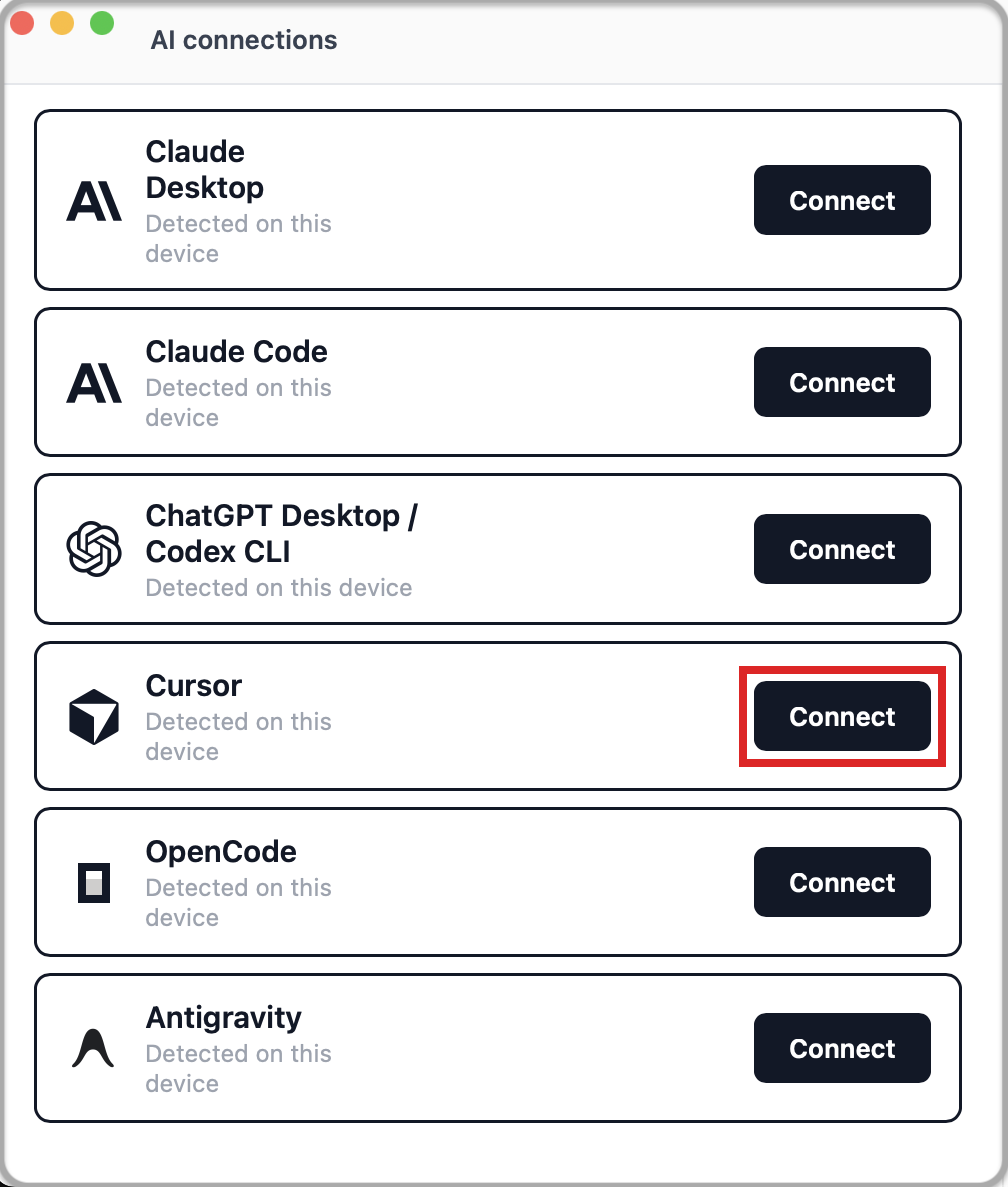
- In Cursor, Refresh MCP (or restart Cursor) and enable Chartbuddy for the chat.
Setup by prompting Cursor
Paste the following into a Cursor agent chat:
text
Set up the Chartbuddy Hub MCP server for this Cursor install:

1. Detect my OS and find the Chartbuddy binary at its default install path:
   - macOS: /Applications/Chartbuddy.app/Contents/MacOS/chartbuddy
   - Windows: %LOCALAPPDATA%\Programs\Chartbuddy\chartbuddy.exe
   If it's not there, ask me for the correct path. Don't guess or search the whole filesystem.

2. Open my user MCP config (create it if missing):
   - macOS / Linux: ~/.cursor/mcp.json
   - Windows: %USERPROFILE%\.cursor\mcp.json
   Prefer this user/global file – do not write a project-scoped mcp.json.

3. If mcpServers already has "Chartbuddy-Hub" or "chartbuddy" pointing at
   Chartbuddy with args ["--mcp"], tell me and stop.

4. Add or replace (leave other servers untouched):
   "Chartbuddy-Hub": {
     "type": "stdio",
     "command": "<resolved path>",
     "args": ["--mcp"]
   }
   Remove a legacy "chartbuddy" entry if it pointed at Chartbuddy.

5. Confirm the bridge: <resolved path> --mcp-status
   (exit 0 = up, exit 1 = unreachable. If unreachable, tell me to launch
   Chartbuddy Hub first. Don't launch it yourself.)

6. Tell me to Refresh MCP (or restart Cursor) and enable Chartbuddy for
   the chat. If tools still do not appear, start a new agent chat.
Setup manually
1. Install Chartbuddy Hub
Install Chartbuddy Hub and launch it once before you add the server (approve OS security prompts).
2. Add a custom MCP in Cursor
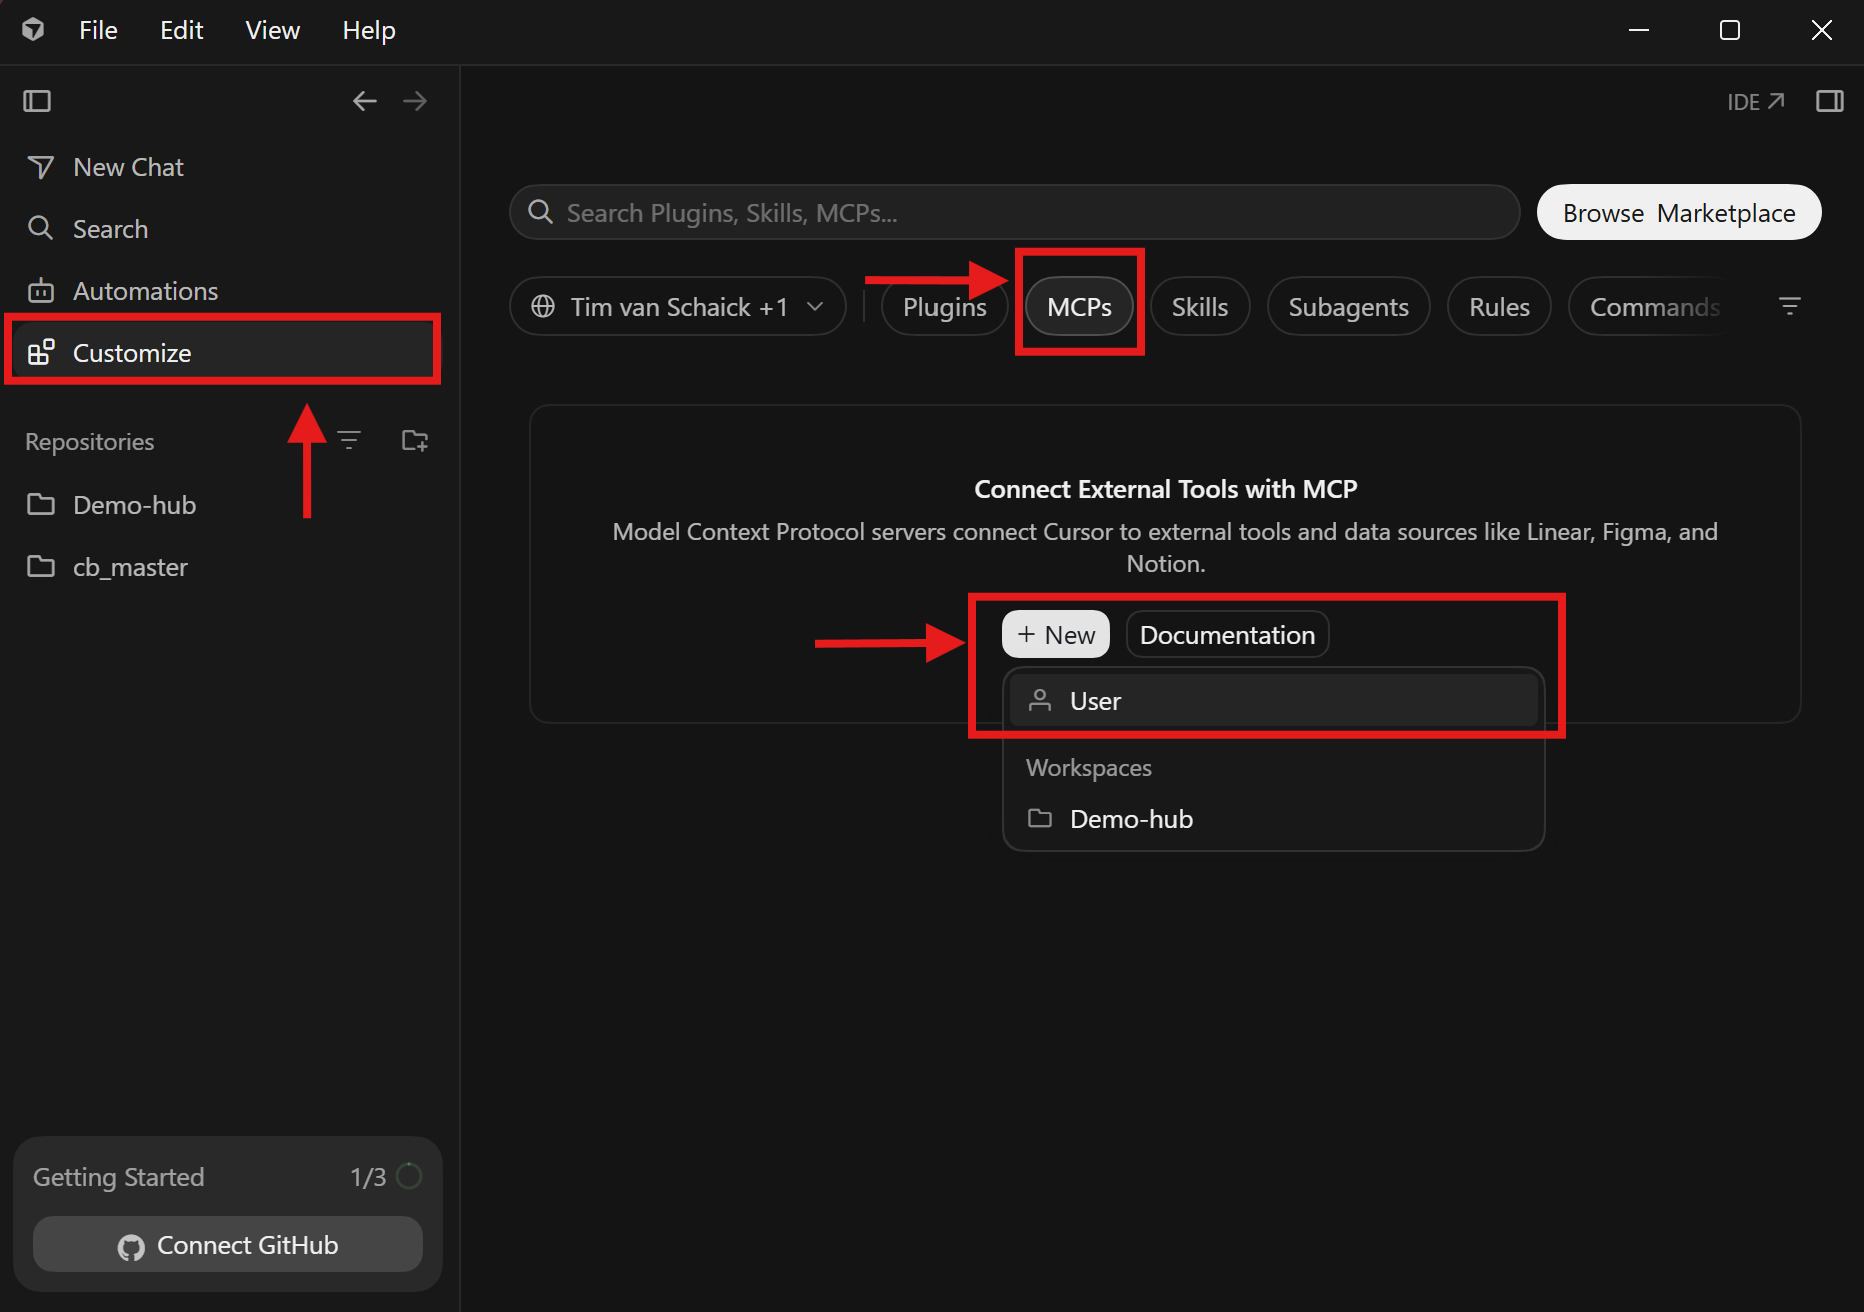
In the Agents view:
- Click Customize in the sidebar.
- Select MCPs.
- Click New MCP Server.
- Choose User (not Workspace), so the server is available in every project, not just the current one.
That opens your user mcp.json:
- macOS / Linux:
~/.cursor/mcp.json - Windows:
%USERPROFILE%\.cursor\mcp.json
Prefer this Home / global config – do not commit a project-scoped copy.
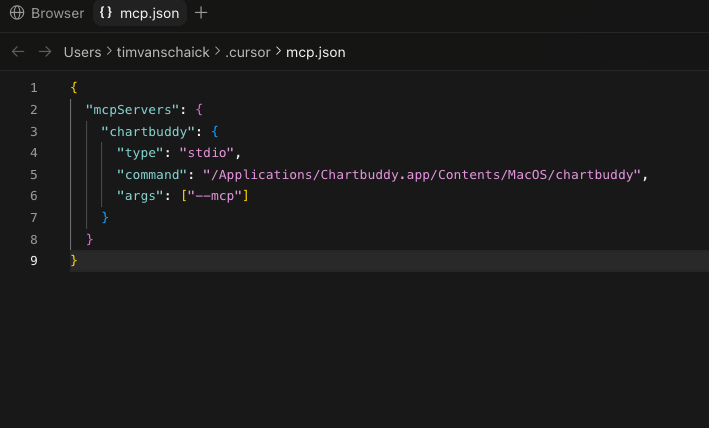
Paste the Chartbuddy server block (toggle OS below), then save the file:
json
{
  "mcpServers": {
    "Chartbuddy-Hub": {
      "type": "stdio",
      "command": "C:\\Users\\YOUR_USER\\AppData\\Local\\Programs\\Chartbuddy\\chartbuddy.exe",
      "args": ["--mcp"]
    }
  }
}
json
{
  "mcpServers": {
    "Chartbuddy-Hub": {
      "type": "stdio",
      "command": "/Applications/Chartbuddy.app/Contents/MacOS/chartbuddy",
      "args": ["--mcp"]
    }
  }
}
Prefer one global config. Duplicate global + project entries make it unclear which server the agent is using.
3. Refresh and use
Refresh MCP (or restart Cursor) and enable Chartbuddy for the chat. Mid-chat attach usually works after a refresh; if tools still do not appear, start a new agent chat.
Verify
powershell
& "$env:LOCALAPPDATA\Programs\Chartbuddy\chartbuddy.exe" --mcp-statusbash
/Applications/Chartbuddy.app/Contents/MacOS/chartbuddy --mcp-statusExit 0 = Chartbuddy Hub bridge up. Keep Chartbuddy Hub running while you chart.