
Appearance
Connect Claude Desktop
Wire the Claude desktop app to Chartbuddy Hub over local stdio MCP. Claude in the browser (claude.ai) cannot reach Hub; see Connect Claude (web).
Connect with Hub
Install Chartbuddy Hub and launch it once (approve OS security prompts).
In Hub, open Settings → Bring-your-own-AI. You also get there from Connections in the sidebar: click + under your AI apps.
Click Connect on the Claude Desktop row. Hub adds the server to Claude's config file.
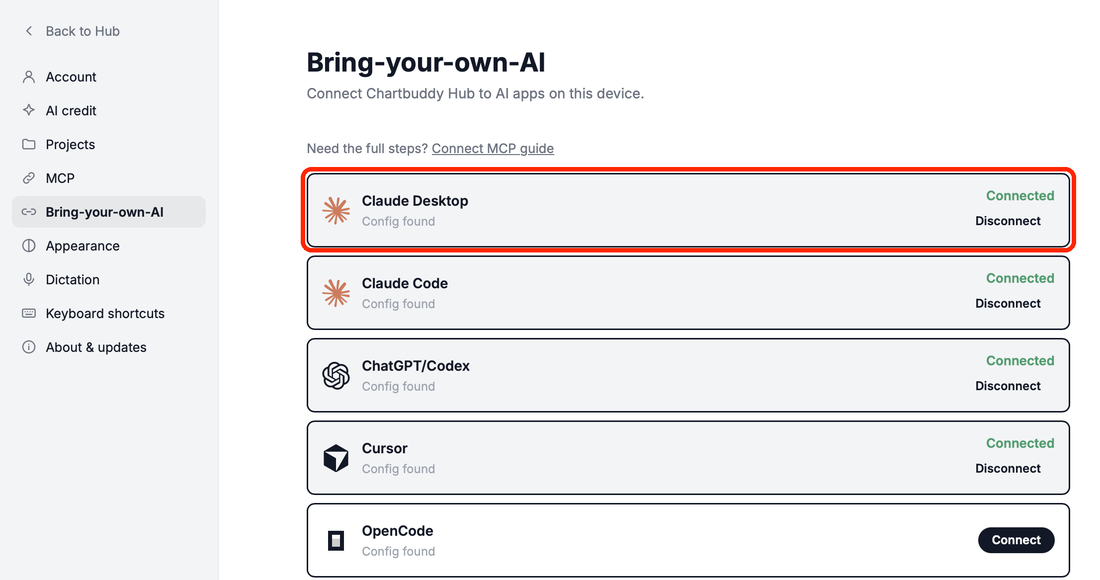
- Quit Claude Desktop fully (not just the window) and open it again. The Chartbuddy-Hub tools then show up in Claude's tools menu.
Manual setup
Use this only if the Connect button does not work for you.
- In Claude Desktop, open Settings → Developer → Edit Config. That opens
claude_desktop_config.json:- macOS:
~/Library/Application Support/Claude/claude_desktop_config.json - Windows:
%APPDATA%\Claude\claude_desktop_config.json
- macOS:
- Add the Chartbuddy-Hub entry under
mcpServersand leave other servers as they are:
json
{
  "mcpServers": {
    "Chartbuddy-Hub": {
      "command": "C:\\Users\\YOUR_USER\\AppData\\Local\\Chartbuddy\\chartbuddy.exe",
      "args": ["--mcp"]
    }
  }
}
json
{
  "mcpServers": {
    "Chartbuddy-Hub": {
      "command": "/Applications/Chartbuddy.app/Contents/MacOS/chartbuddy",
      "args": ["--mcp"]
    }
  }
}- Save the file, then quit Claude Desktop fully and open it again.
Verify
powershell
& "$env:LOCALAPPDATA\Chartbuddy\chartbuddy.exe" --mcp-statusbash
/Applications/Chartbuddy.app/Contents/MacOS/chartbuddy --mcp-statusExit 0 = Chartbuddy Hub bridge up. Keep Chartbuddy Hub running while you chart.